Sunday, December 22, 2019

Plansifter Project

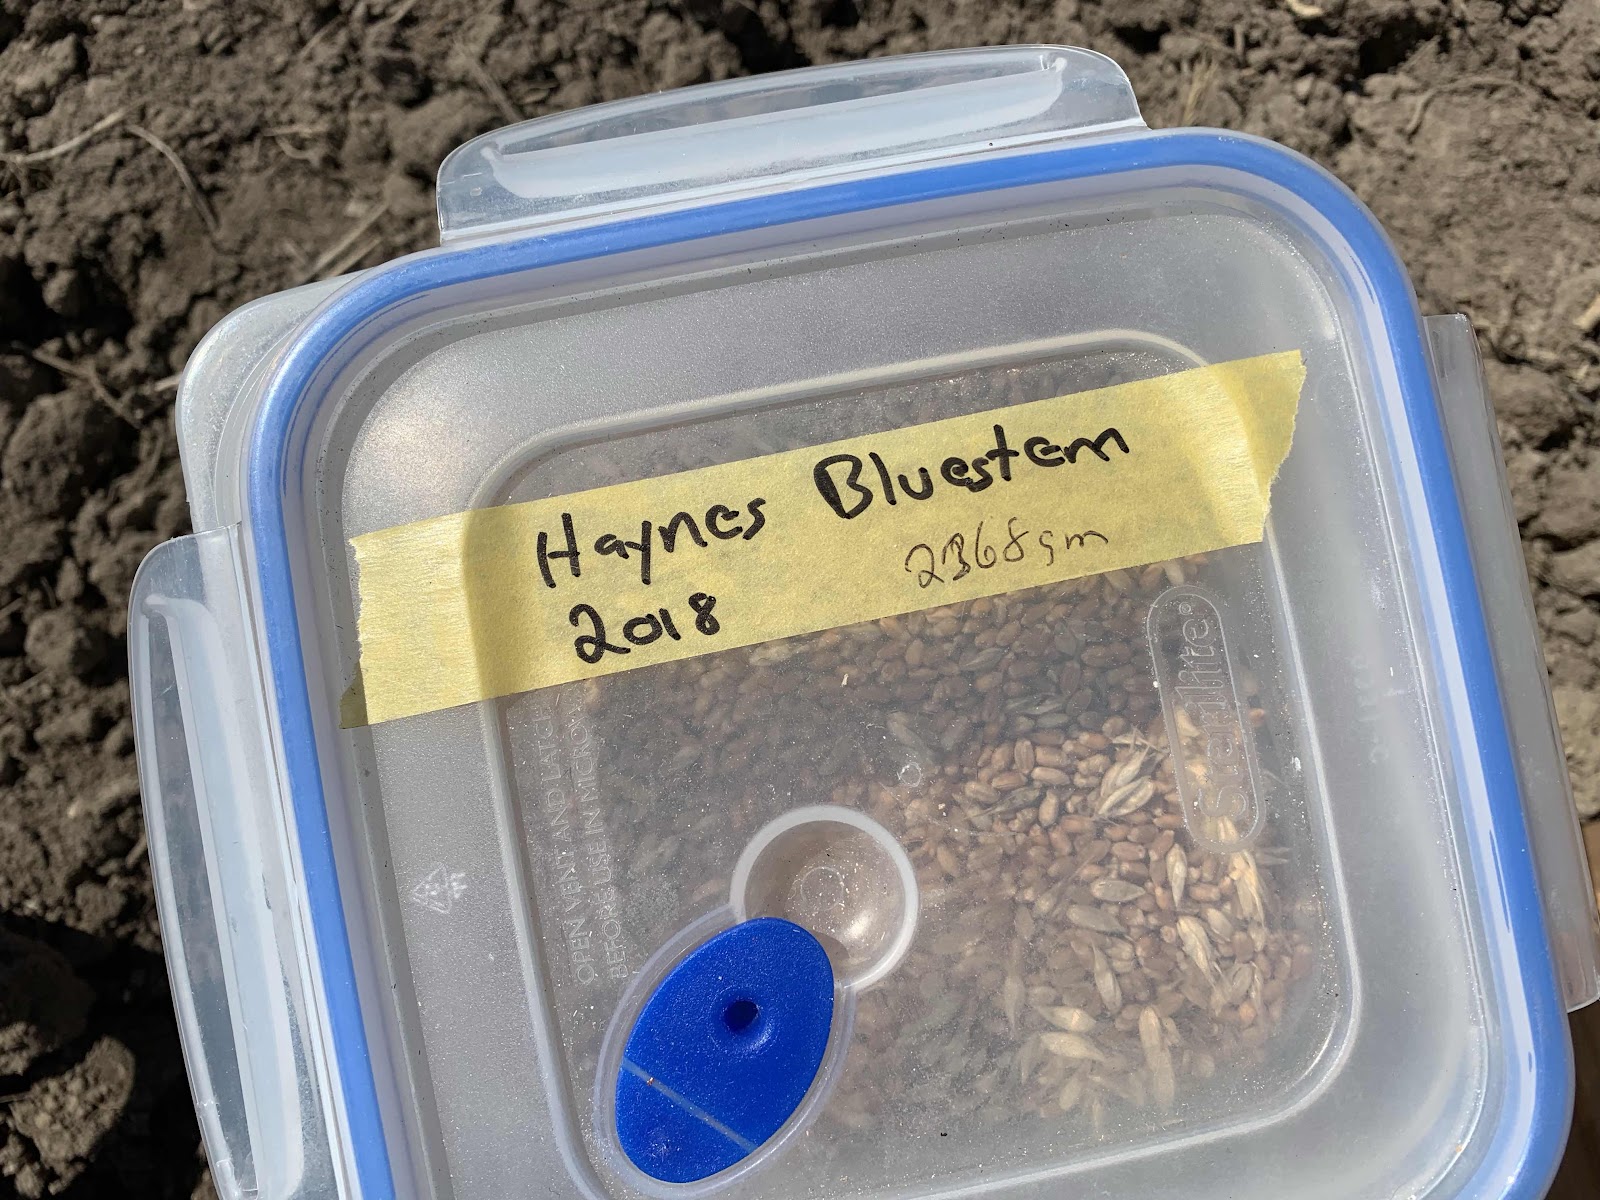
I built a planetary sifter, or plansifter, this month to replace the bolting reel sifter I had been using for the past few years.  The bolting reel had trouble in the collection system, where flour would pile up underneath the reel and then get pushed over into the bran chute.  The problem was not acute, but it always bothered me that some of the flour was going out with the bran.  Hence the plansifter project.

A plansifter is a box filled with sifting trays.  The box hangs on flexible canes, and a motor with an intentionally out-of-balance counterweight causes the whole things to move in a circle.  The target is a gyration of 240-250 rpm, and a gyration of 62-65 mm.  See https://www.millingsystems.com/wnewsdisp.php?id=4040 for more information.

My unit is running at 250 rpm but the gyration is only around 40 mm.  I wish it were more but I'm afraid to put more counterweight on.  Right now I have 18 lbs of counterweight flying around about 6" from the shaft, which is already quite terrifying to me.  So for the time being I'll keep things as is.  However, the flour did not really move at all until I was well over 12 lbs of counterweight.  So if I ever need the unit to move more flour I will add more counterweight.

Here is the formula for gyration (thank you https://forum.bulk-online.com/showthread.php?20776-Counter-Weight-Problem):

The weight of the counterweights required will be equal to:
m = (M x r) / R

where
m = required total weight of all counterweights in pounds
M = total vibrating weight of screen (basket + mechanism + effective material load) in pounds
r = the required radius of vibration in inches
R = the radius from centre line of the mechanism shaft to the centre of gravity of the counterweight in inches

My plansifter is a simple two-part separation.  I built two screens, which I think have more than enough capacity for my 200 lb/hr mill.  The box is nominally 24" x 24" x 12".   I built the box a little taller than needed in case I want more screens at some point.  My target is 95% extraction and I currently use a 28 mesh stainless steel screen with an opening around 700 microns.

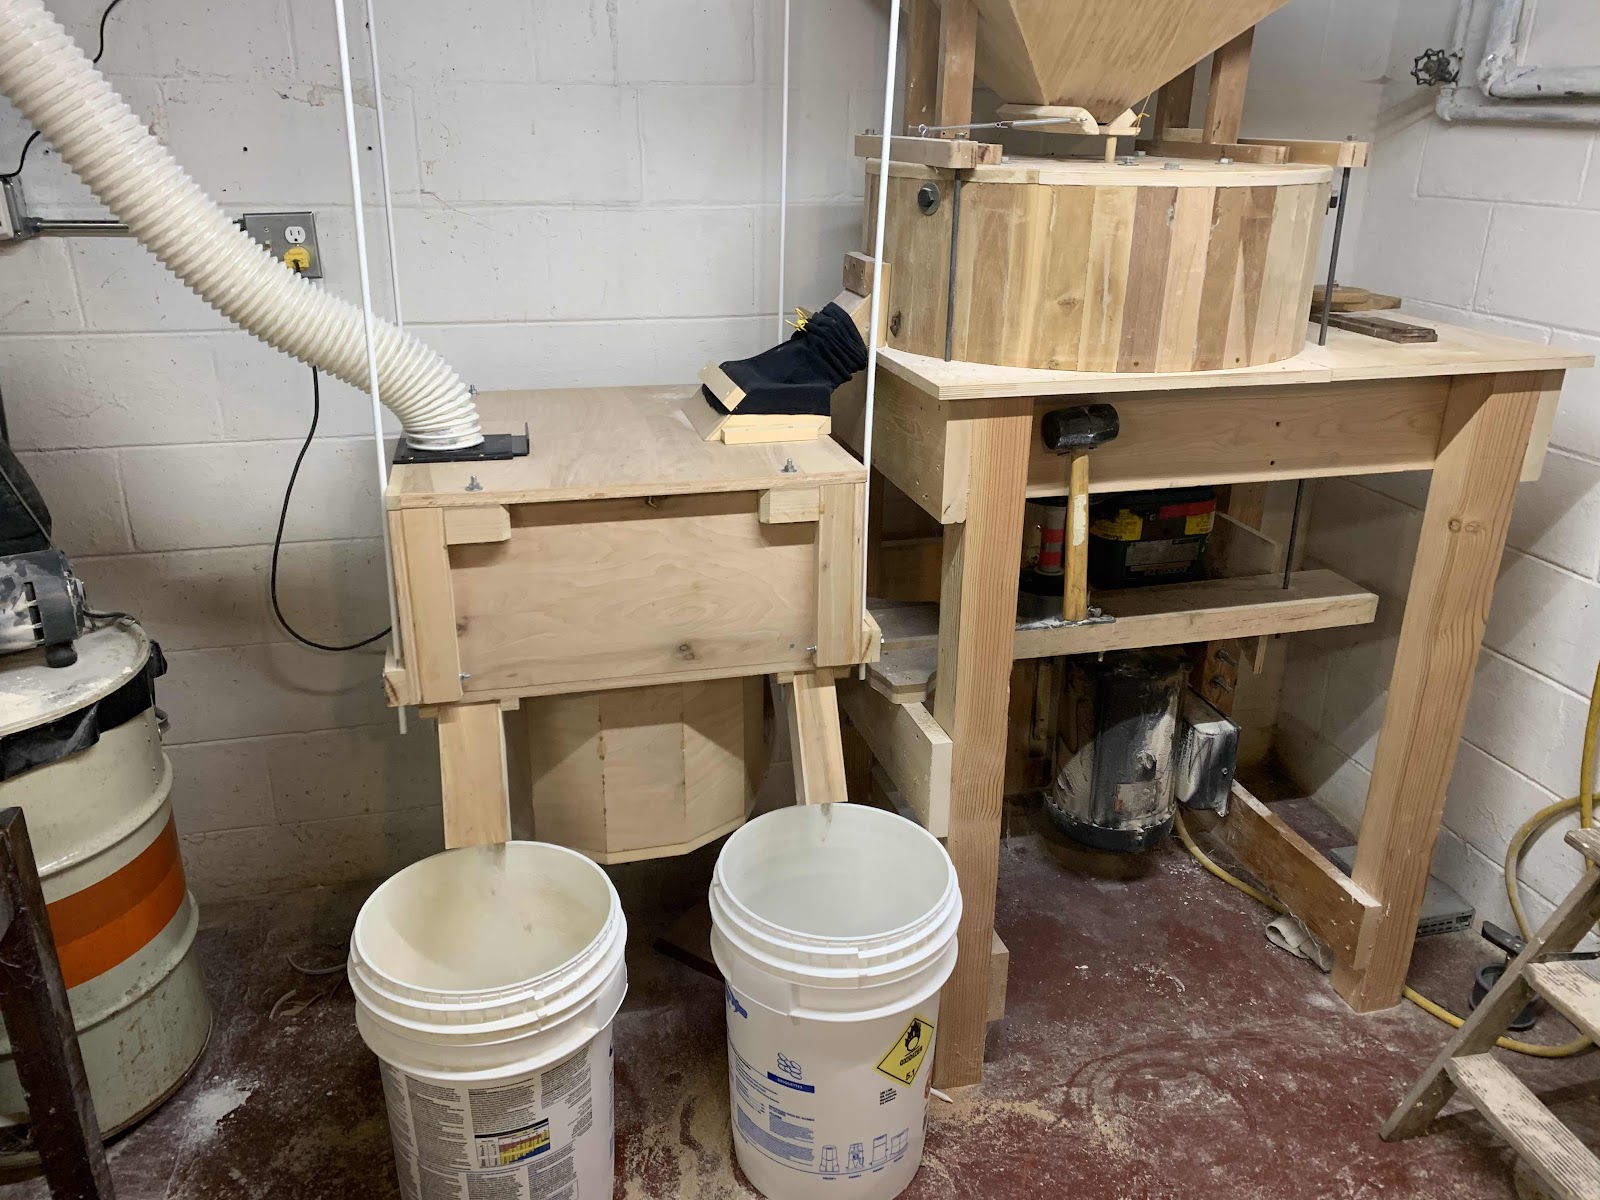
The new plansifter as installed.  I use a shop dust collector to create a slight negative pressure in the unit, which keeps my mill room remarkably dust free.  Flour comes out on the left and bran on the right.  The flour enters at the top right and is dumped directly onto the top screen.  Anything that falls through the screen gets pushed off to the side by the tray cleaners and falls to the bottom of the box.  The bran flows to the left and then drops down to a second screen, where it starts flowing to the right.  Anything that goes through the second screen also falls to the bottom of the box and out the left spout.  Basically you just have to seal up and baffle everything so that there is no choice about what media ends up where.  The constant shaking of the plansifter ensures that product will continue to flow.

Startup of the plansifter is a little dicey.  If it bumps the mill the unit will bounce hard and possibly cause damage.  But once it is up and running the unit is rock solid and stays put.  Apparently stable startups are an issue with commercial units as well.  See https://www.gwmfg.com/Pages/HS-tru-balance-drive.htm.

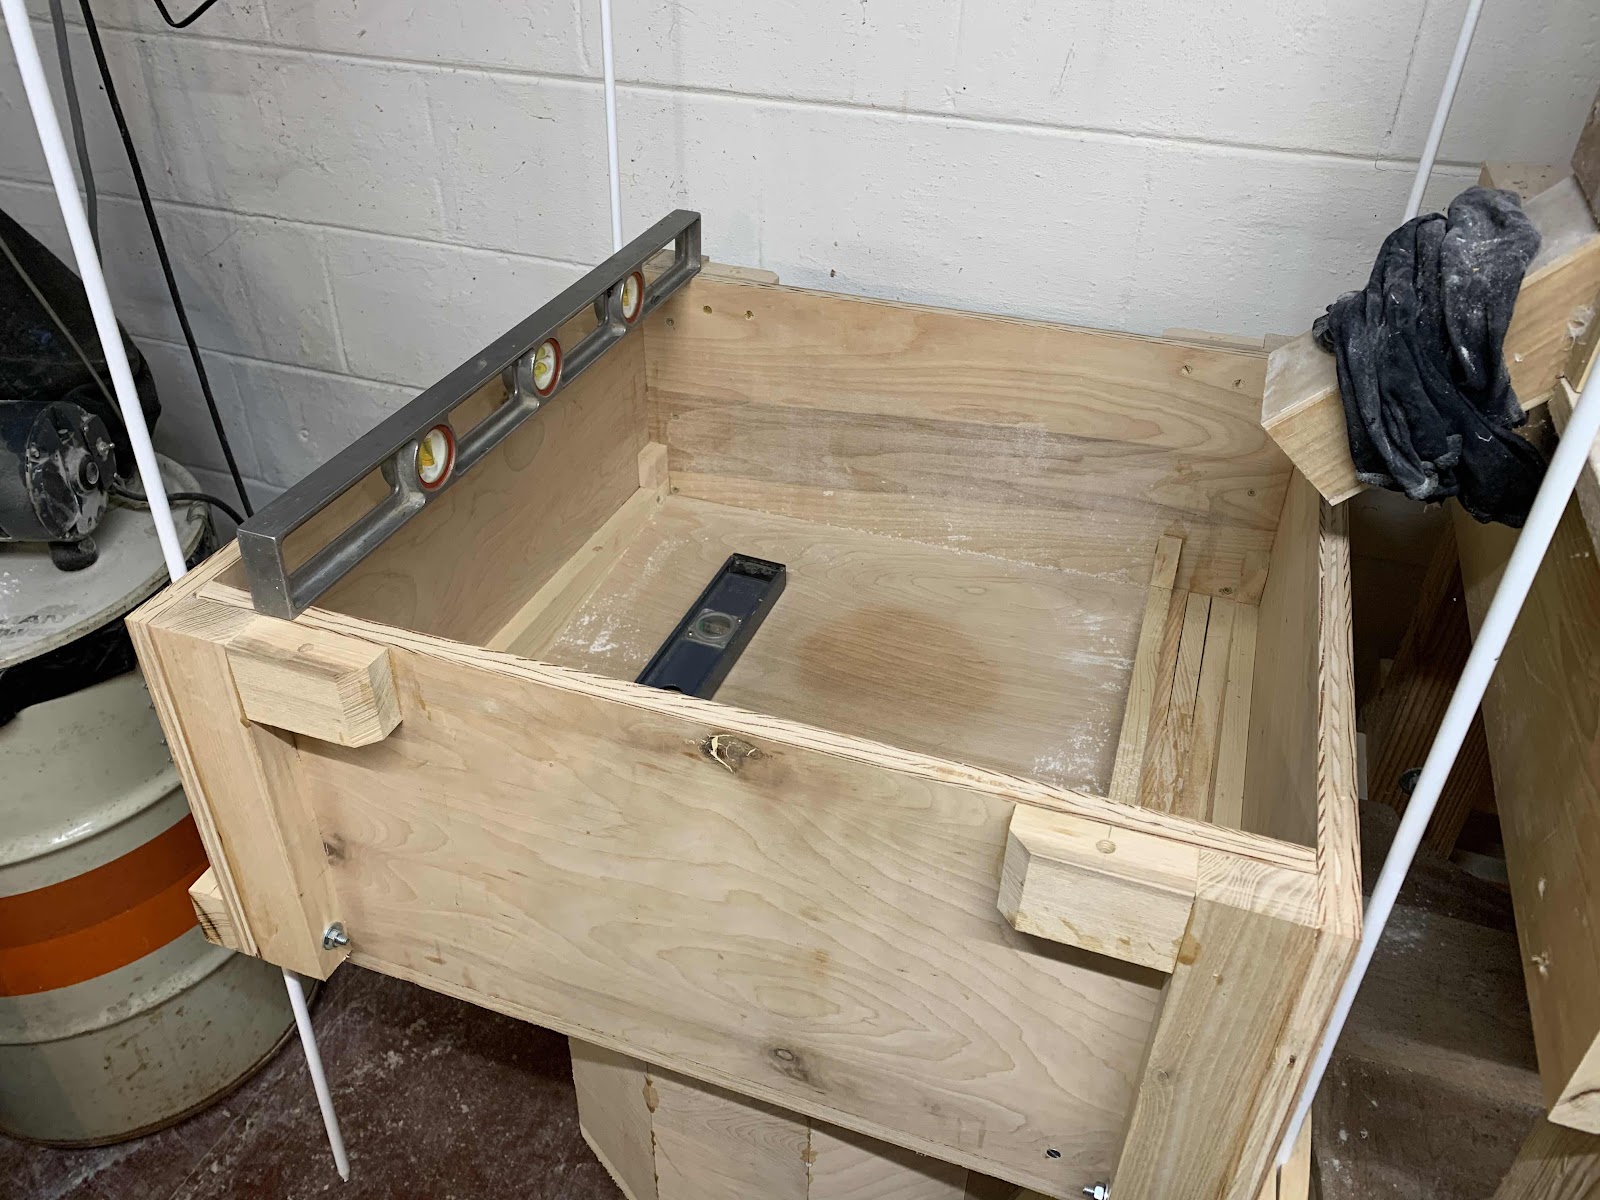
Leveling things off during the installation.  The wooden clamps I made for the canes worked so-so.  The top is held down with four bolts.  Prior to putting the top on, I add shims so that the tray stack is firmly clamped together.  The trays have ordinary wool felt strips between them to seal things off.  Of course, there needs to be a flexible connection for flour going in and out, since the whole thing is going to be shaking at 250 rpm.  I use an old long-sleeve shirt as a gasket between the mill and sifter.

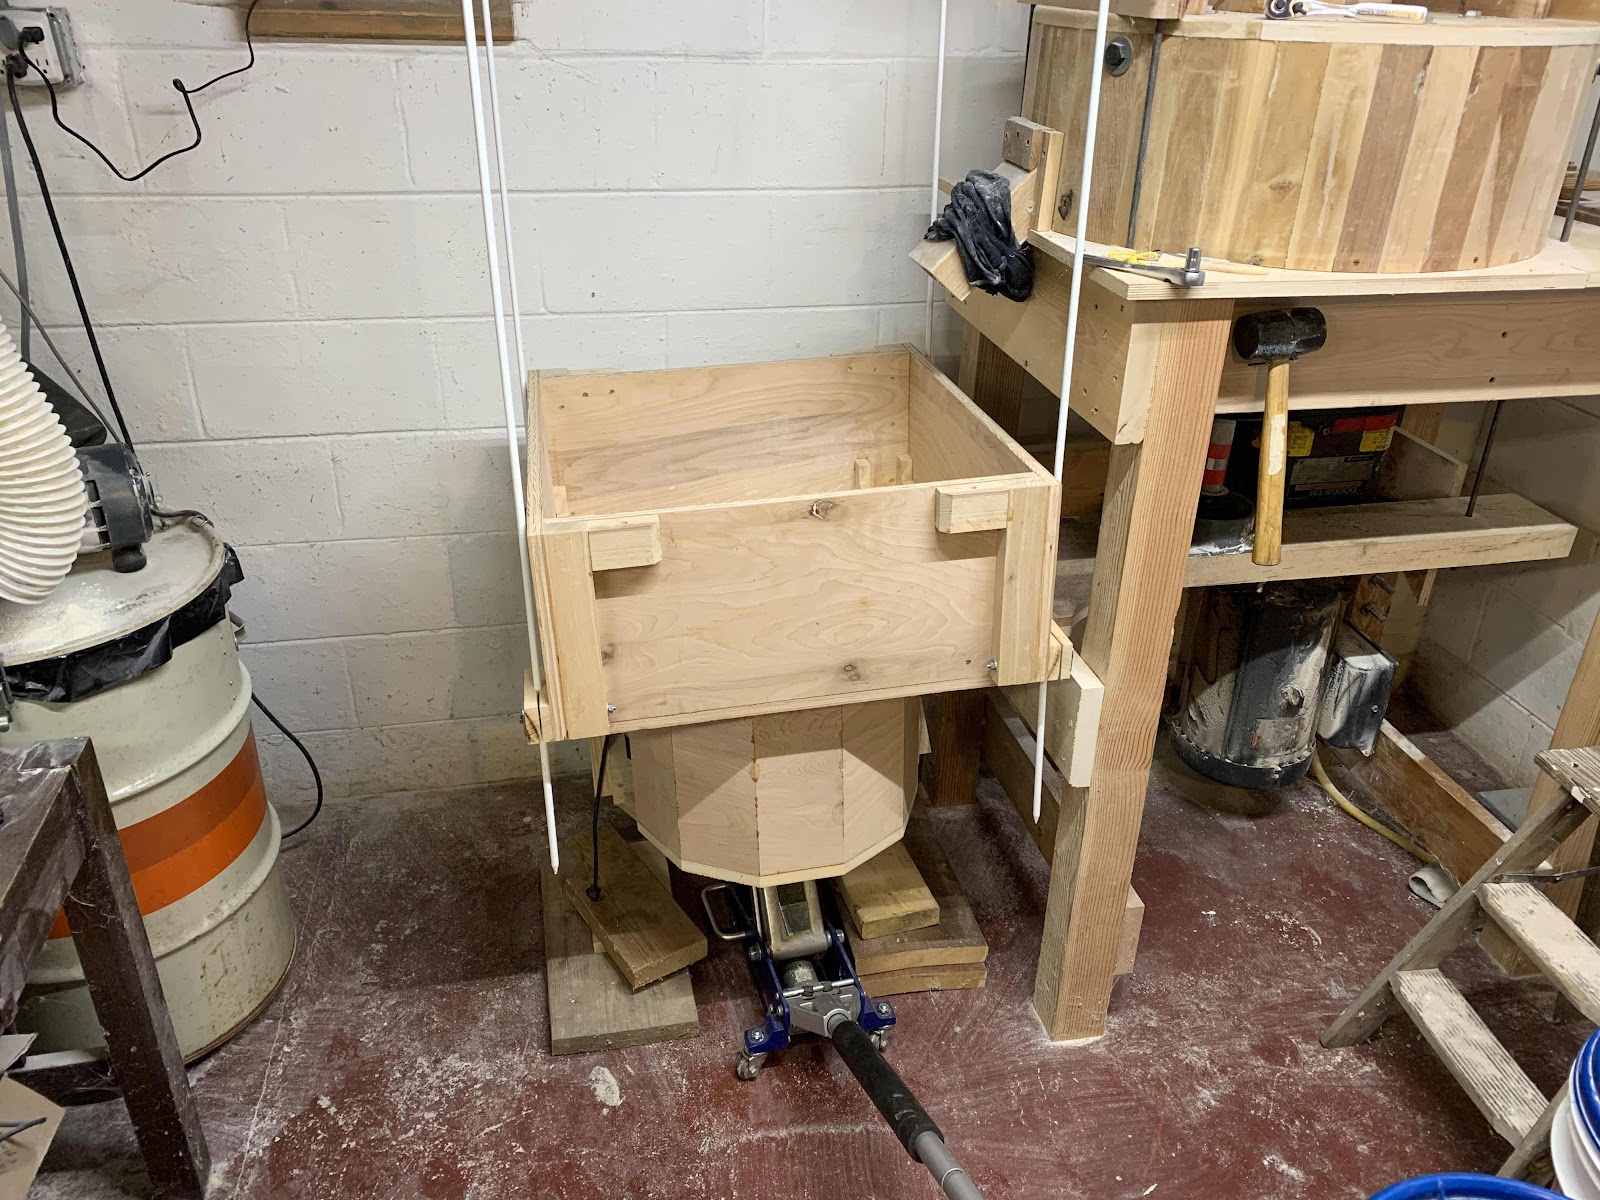
Installing the plansifter.  It hangs from the ceiling on four 3/8" fiberglass fence posts.

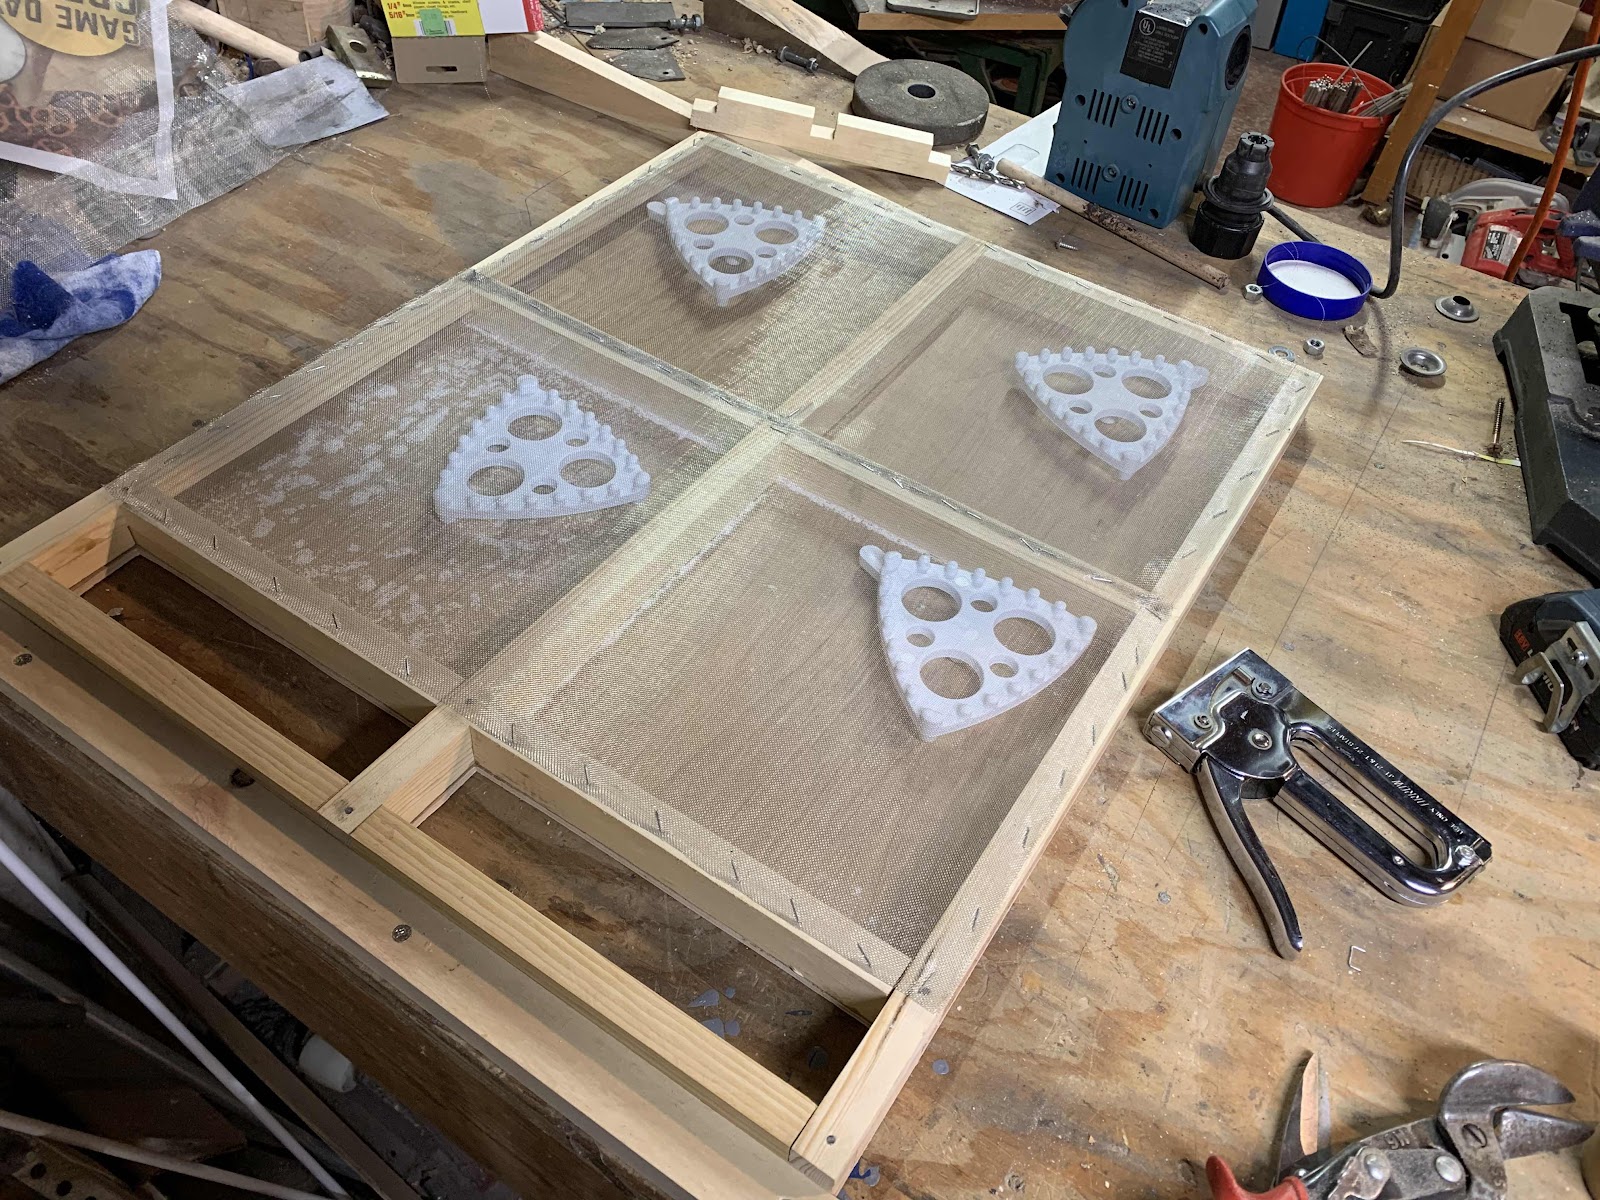
Here is my first sifter tray with tray cleaners and screen installed.  This style does not use backwire.  The bottom of the tray is perfectly flat.  The screen cleaners bounce around, keeping the screen clean and pushing the flour off to the sides.  Cleaners were easily purchased after contacting the folks at Filip in Germany: https://filip-gmbh.com/en/products/for-plansifter-sieves-without-backwire/.  The wood strips on the side are slotted so the flour can slide off.  See https://www.youtube.com/watch?v=-zrWWhUPOzE

Trial fitting.

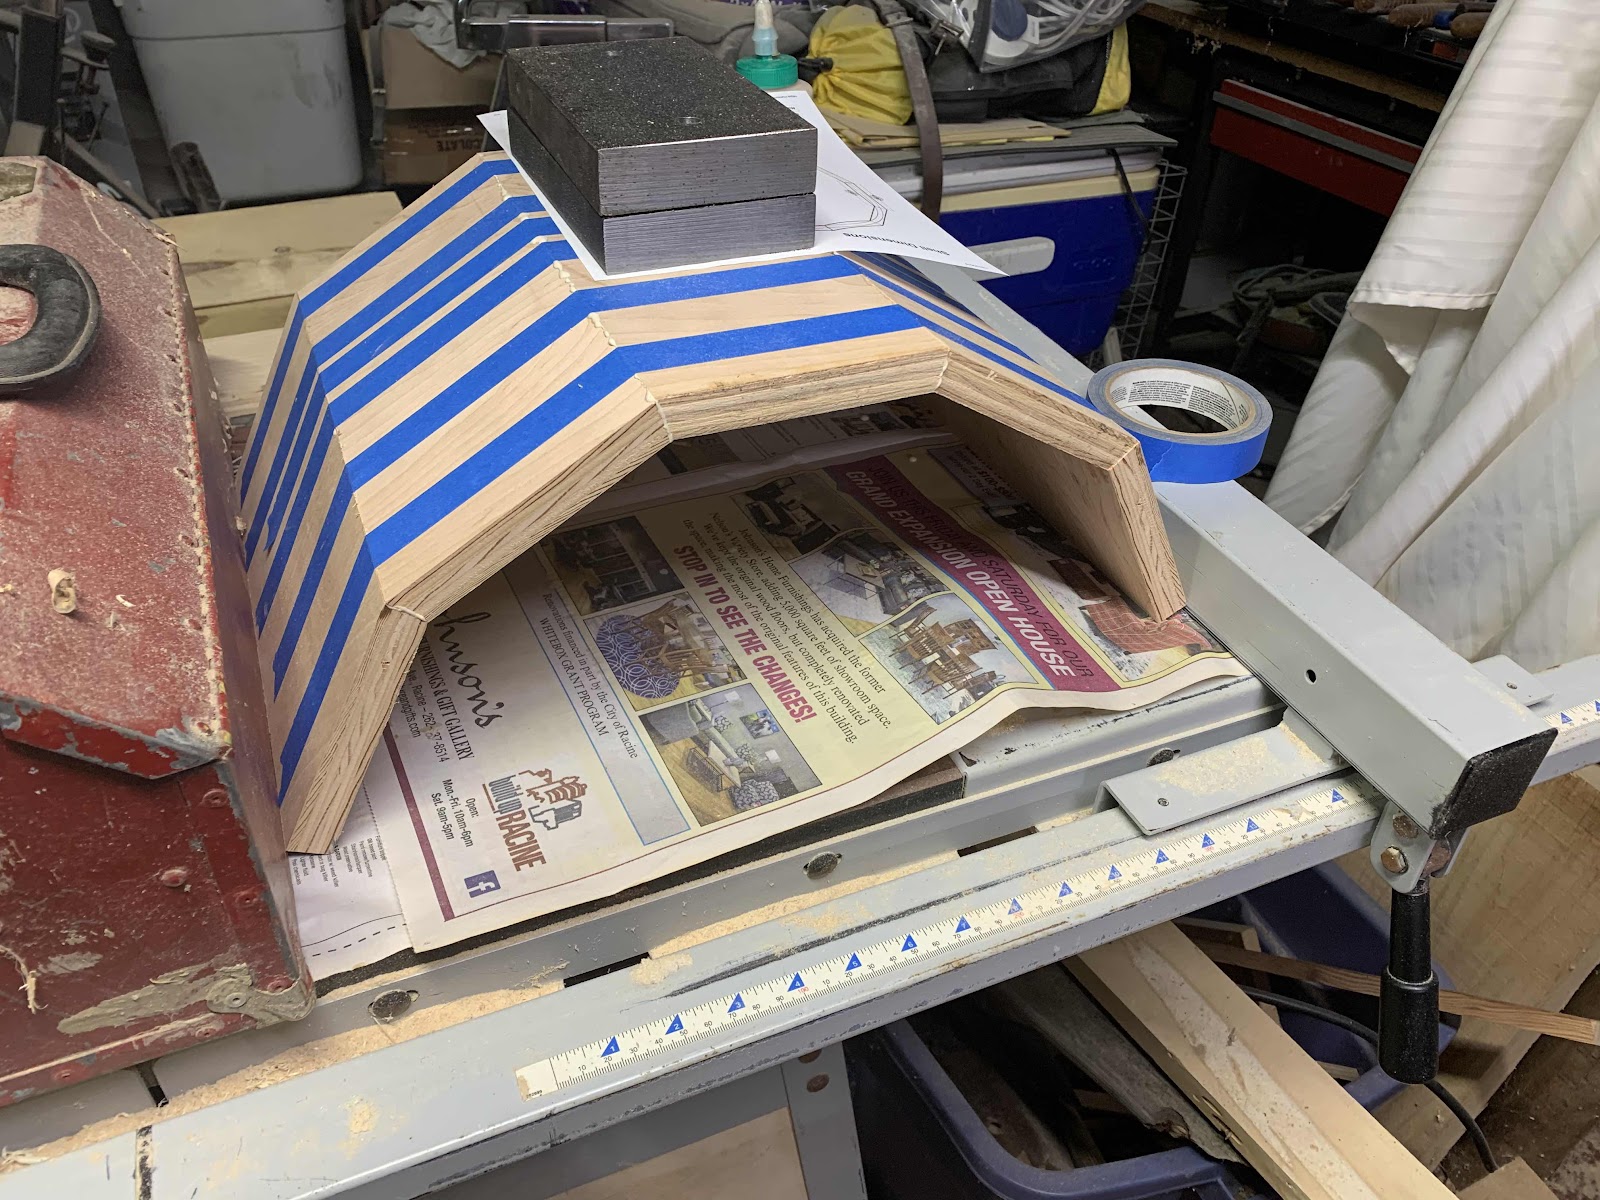
Gluing up a shield for the counterweight. Ultimately I glued it into place and it became part of the bracing for the counterweight shaft.  There is a nice stave calculator at https://uniontownlabs.org/tools/stave/.  Those weights being used to hold it down for gluing are the counterweights.  They are held in place on two 3/8" by 6" bolts off of the steel 3/4" shaft.

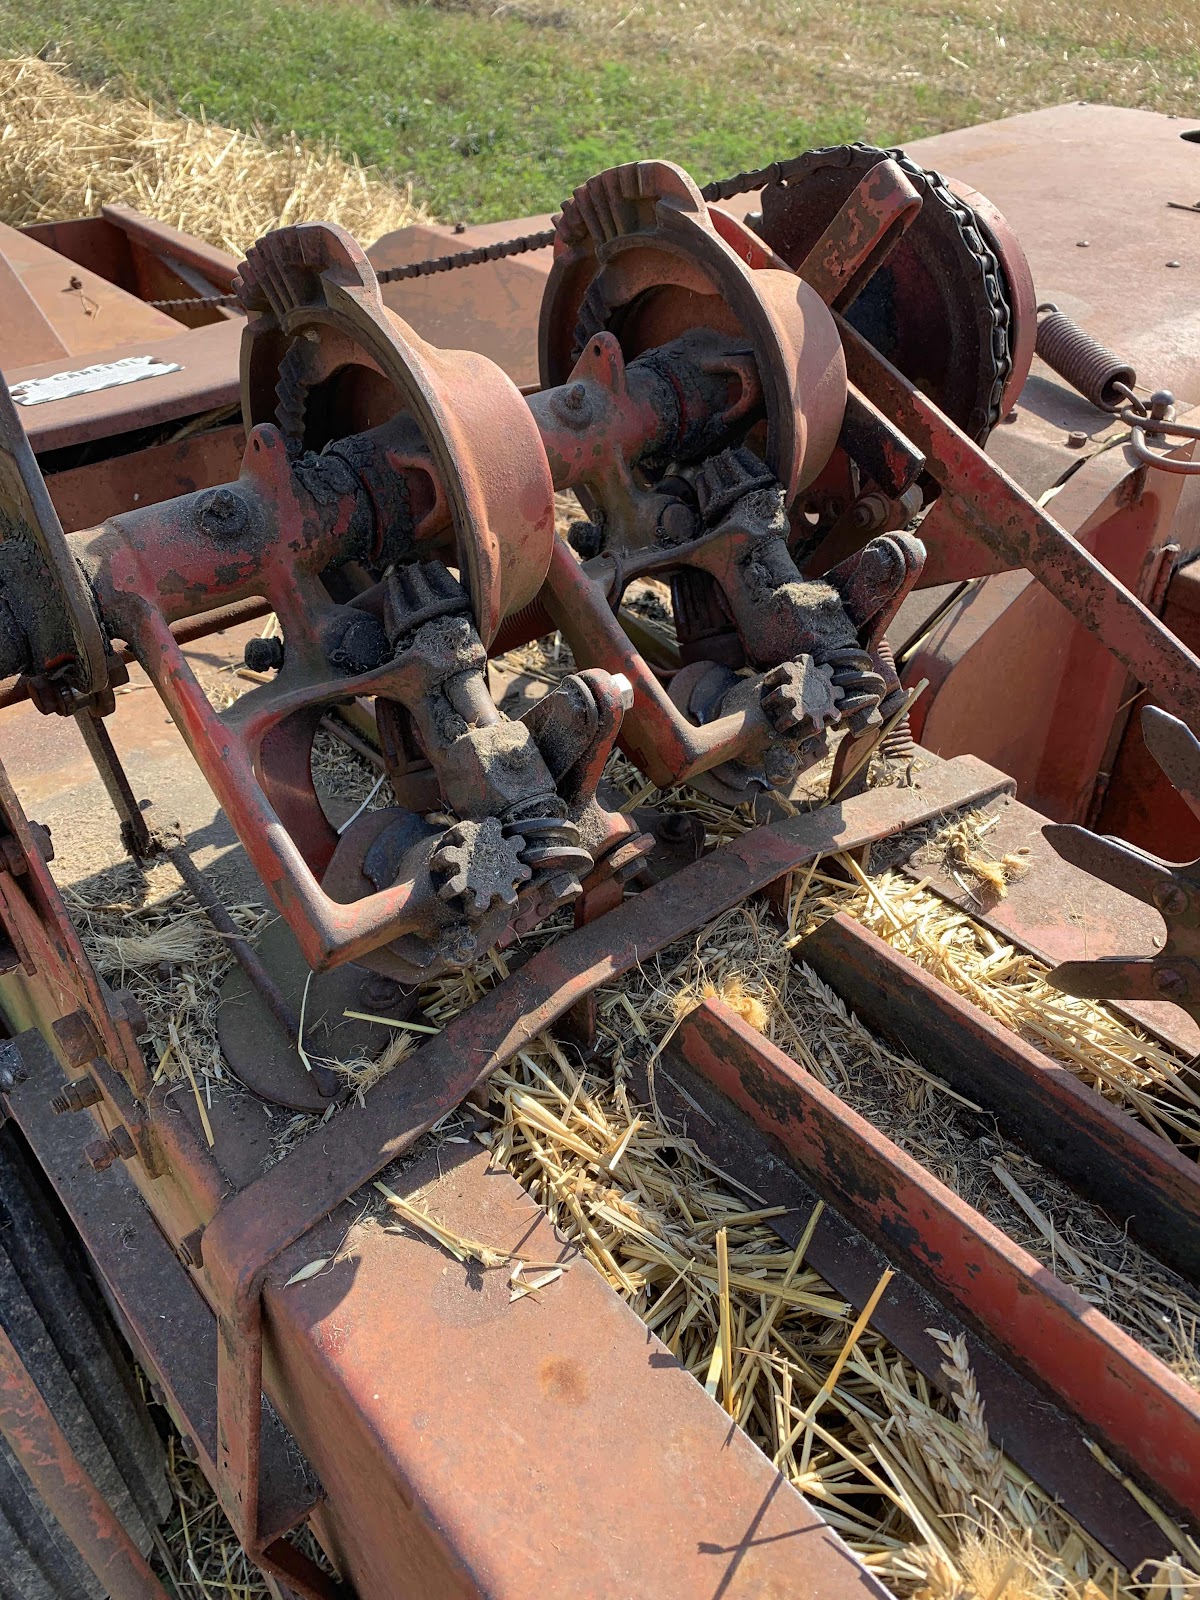
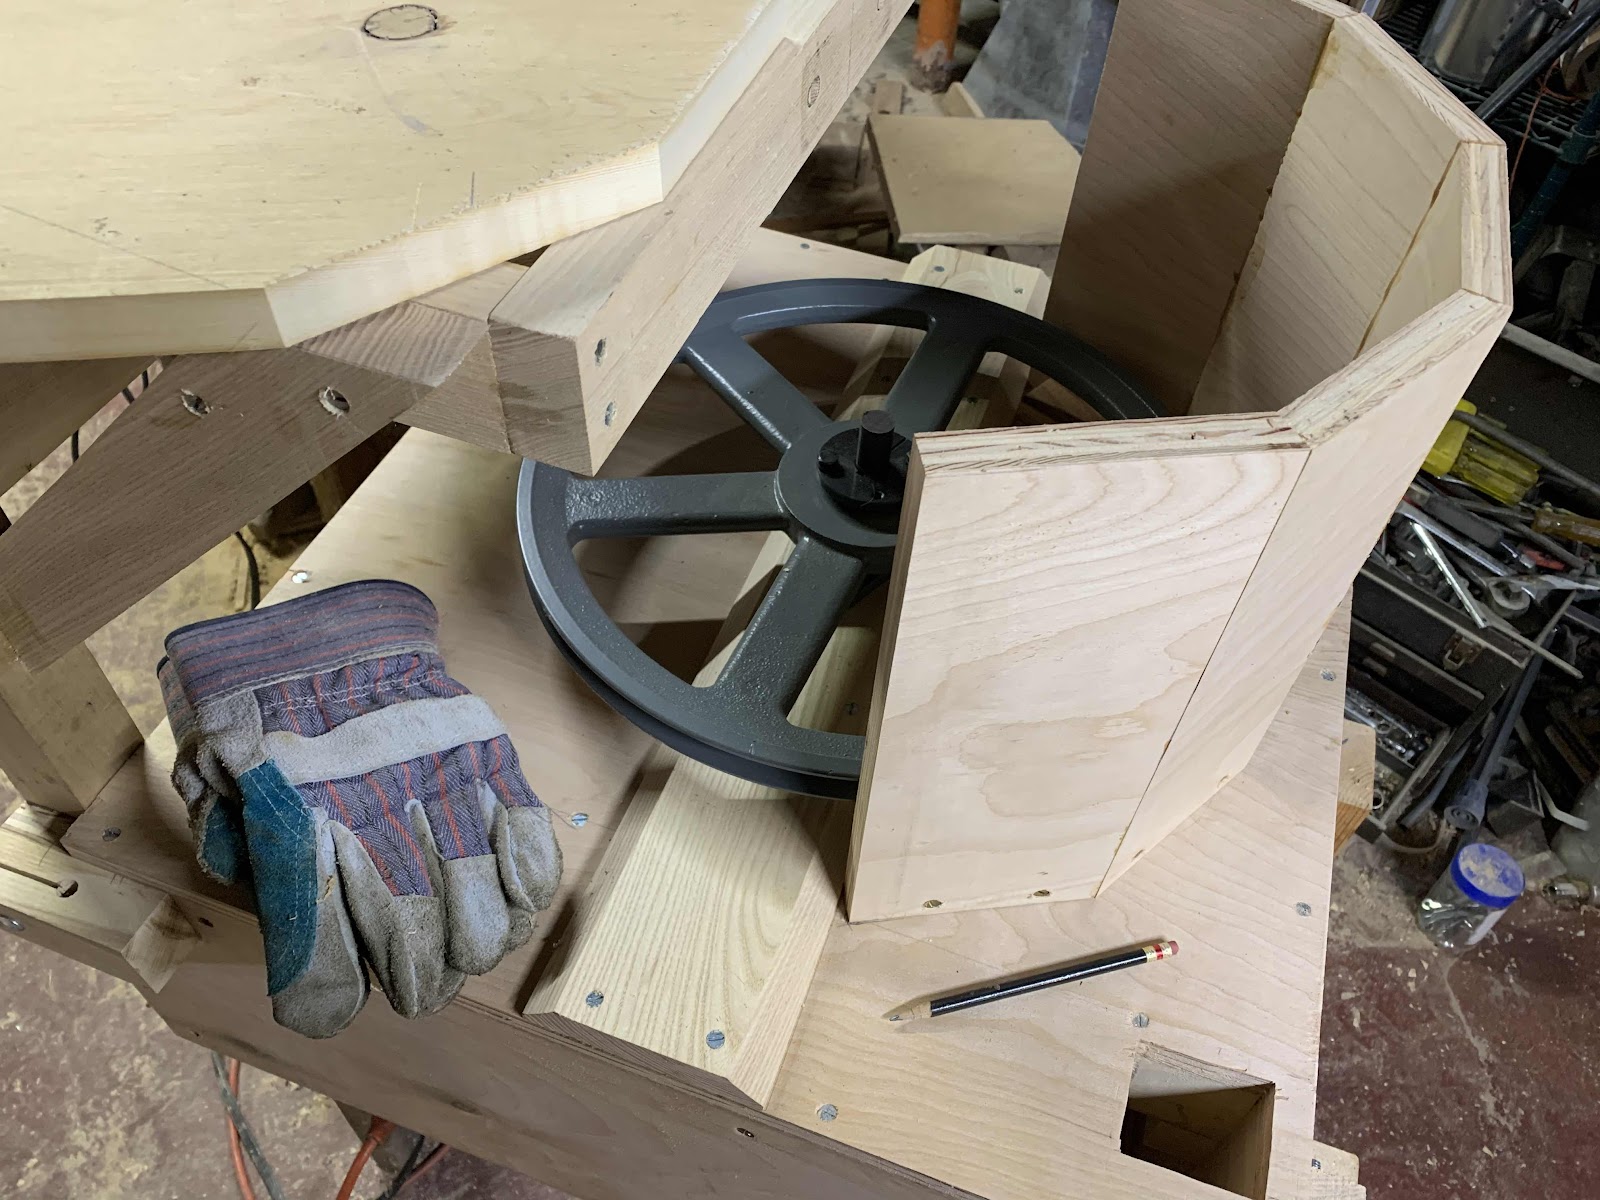
The reduction drive and counterweight shaft.  I had to use a 15" pulley to get down to the target of 240-250 rpm for the counterweight.  This size pulley weighs more than the motor, which is unfortunate.  The heavier the unit, the heavier the counterweight needs to be.  Ideally I would start out with a 1200 rpm motor which would make the reduction easier and lighter.
Machining the keyway on a harbor freight drill press.  Not very precise work, but good enough for a keyway.  I wanted everything to be as strong as possible, not knowing exactly where things would be stressed.

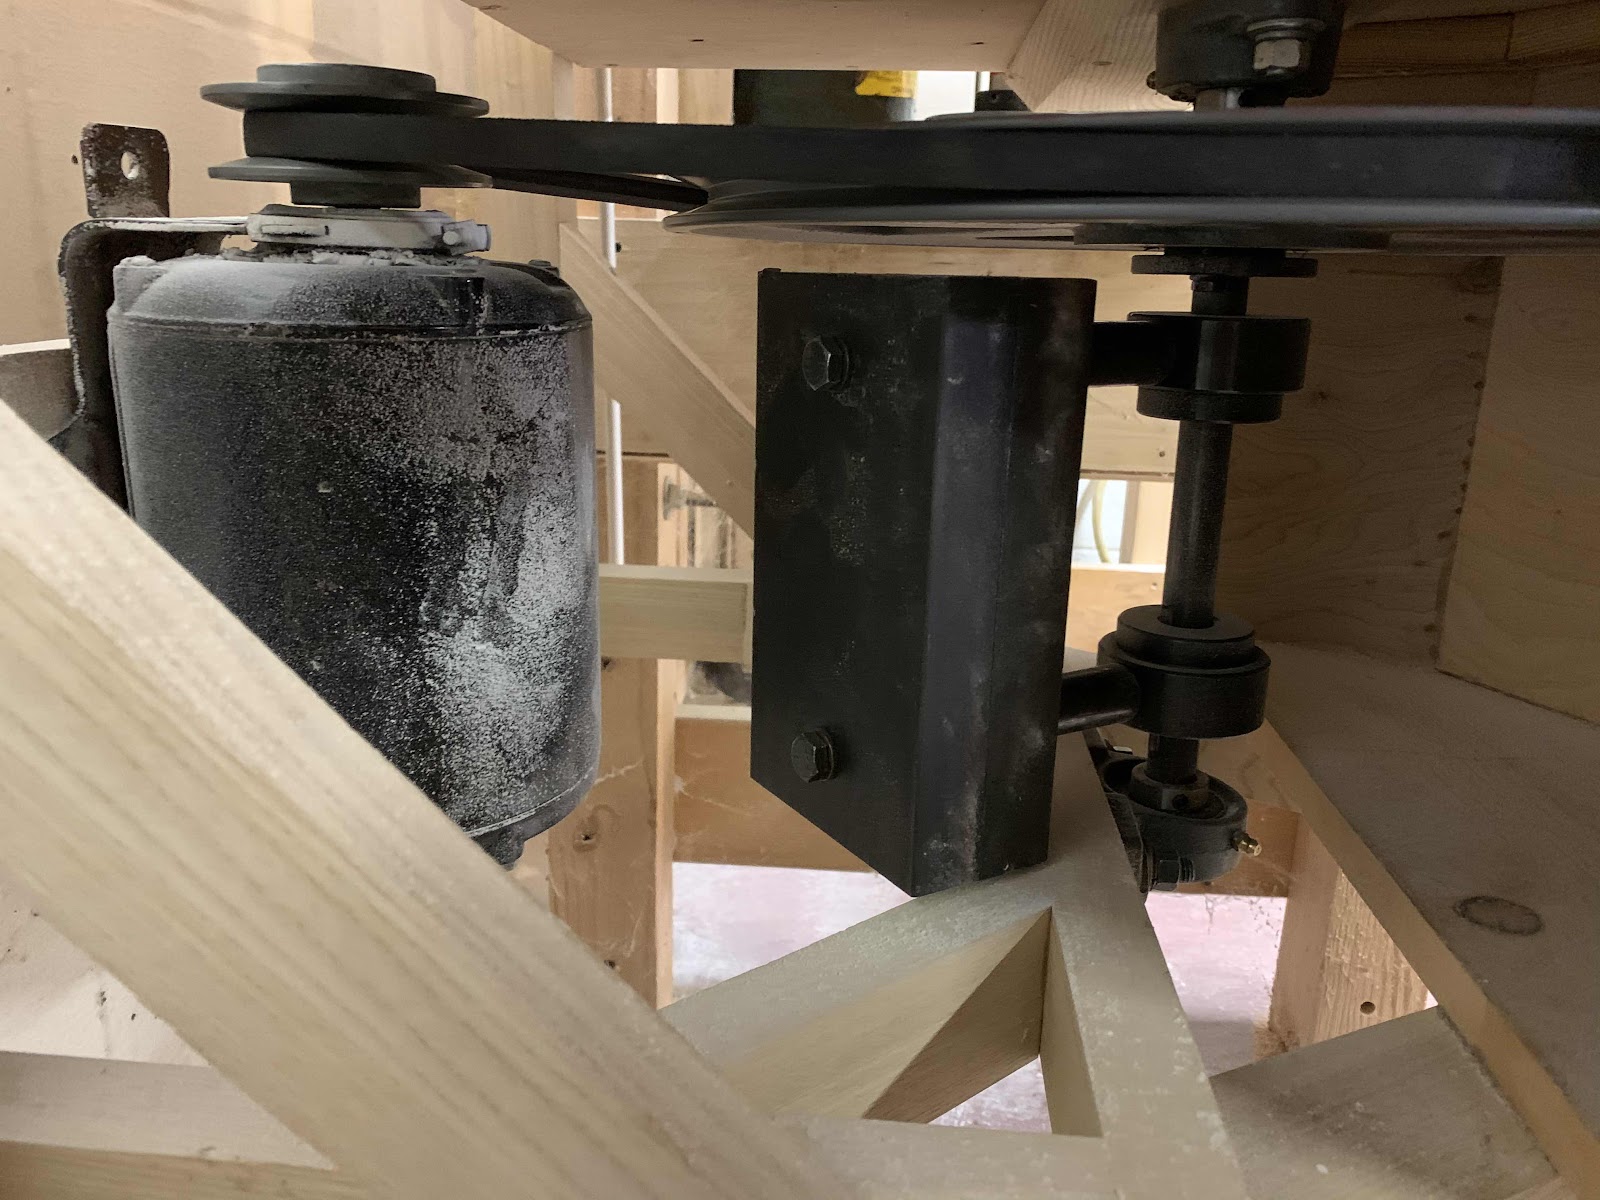
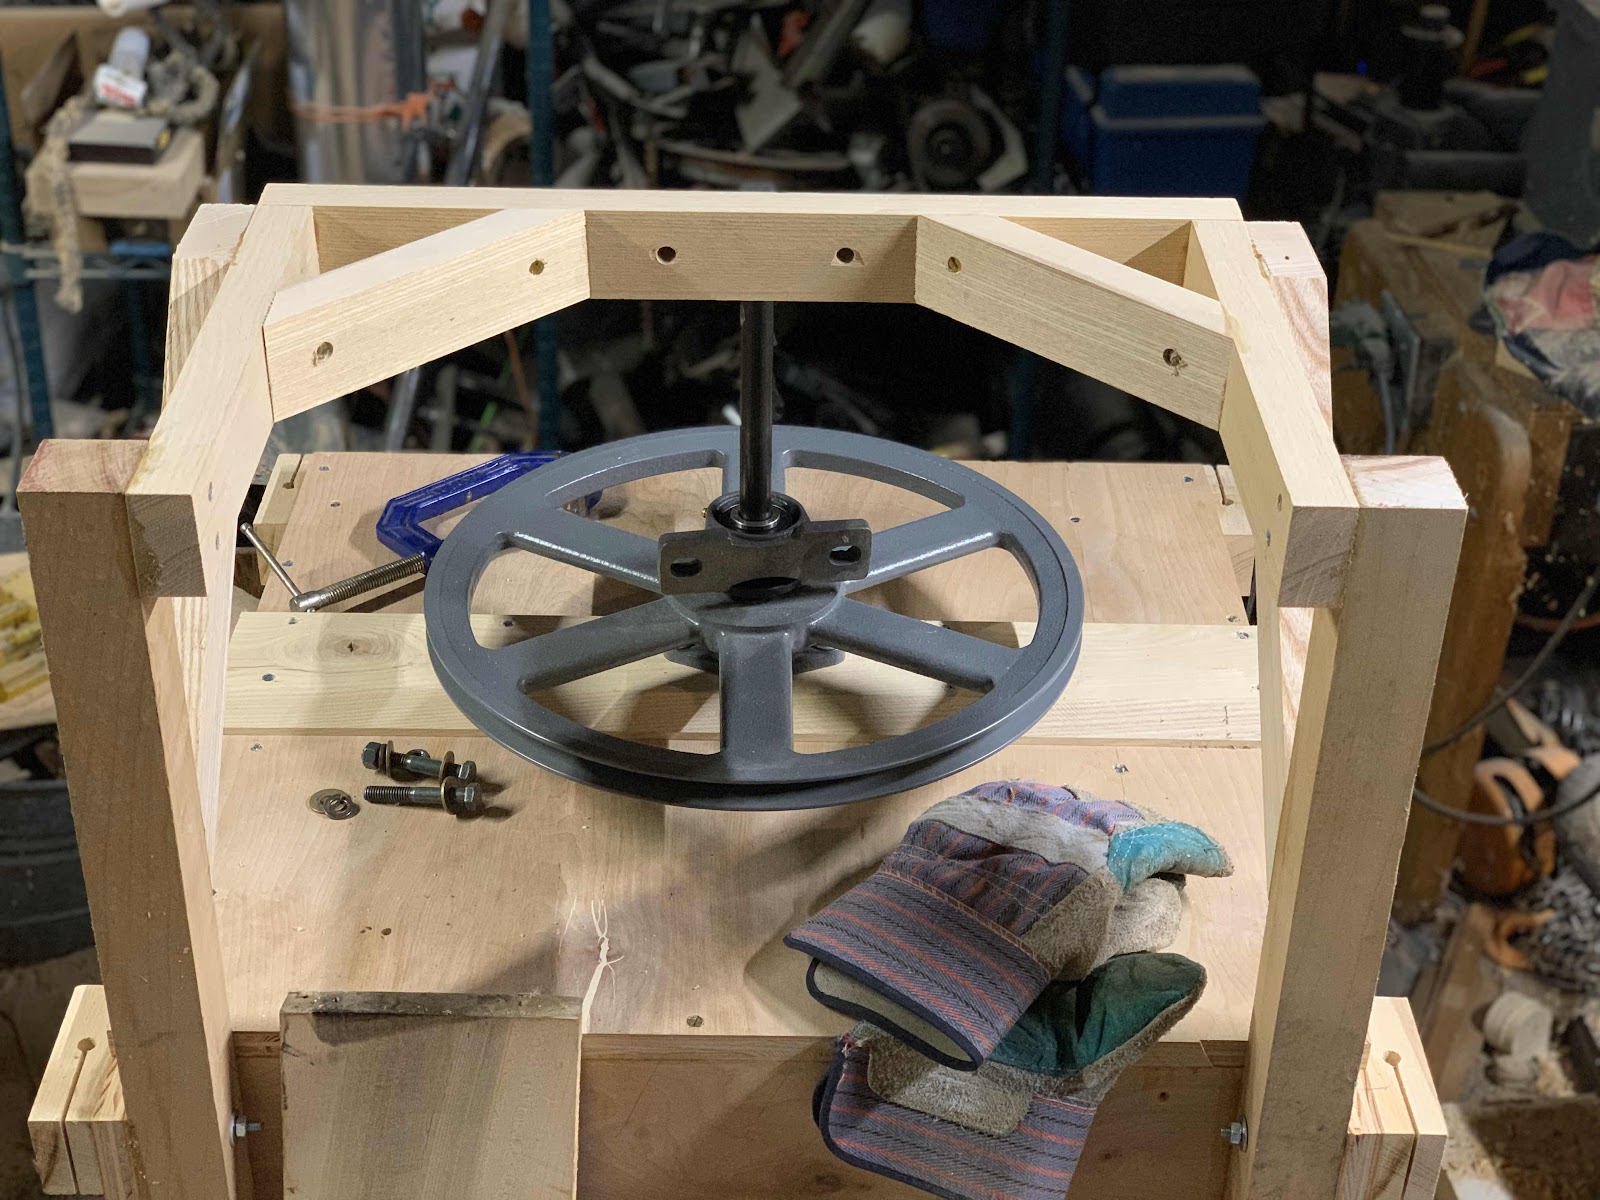
Here is the final motor and counterweight installation.  It's a 3/4" shaft.  I found two 3/4" gear hubs, which I drilled and tapped to accept a 3/8" bolt.  The hubs are held to the shaft with a square key and set screws.  The counterweights just bolt into the hubs.  Spacers are some thick-wall steel tubing.  The motor is an 1800 rpm 1/4 or 1/3 hp unit with an adjustable pulley to tweak the shaft speed.

Here is what it looked like the first time I fitted up a sifting frame.  Everything is perfectly flat, with the exception of the box floor.  If you look close at the bottom of the photo you can see where I am missing baffling.  I figured this out after the first run when I found flour coming out with the bran.

The plansifter needs to be strong--it will undergo a great deal of strain as it is being gyrated.  I chose to make corners with outside hardwood reinforcers.  Everything is glued and screwed.  The reinforcing stringers on one end will help support the counterweight shaft and bracketing.

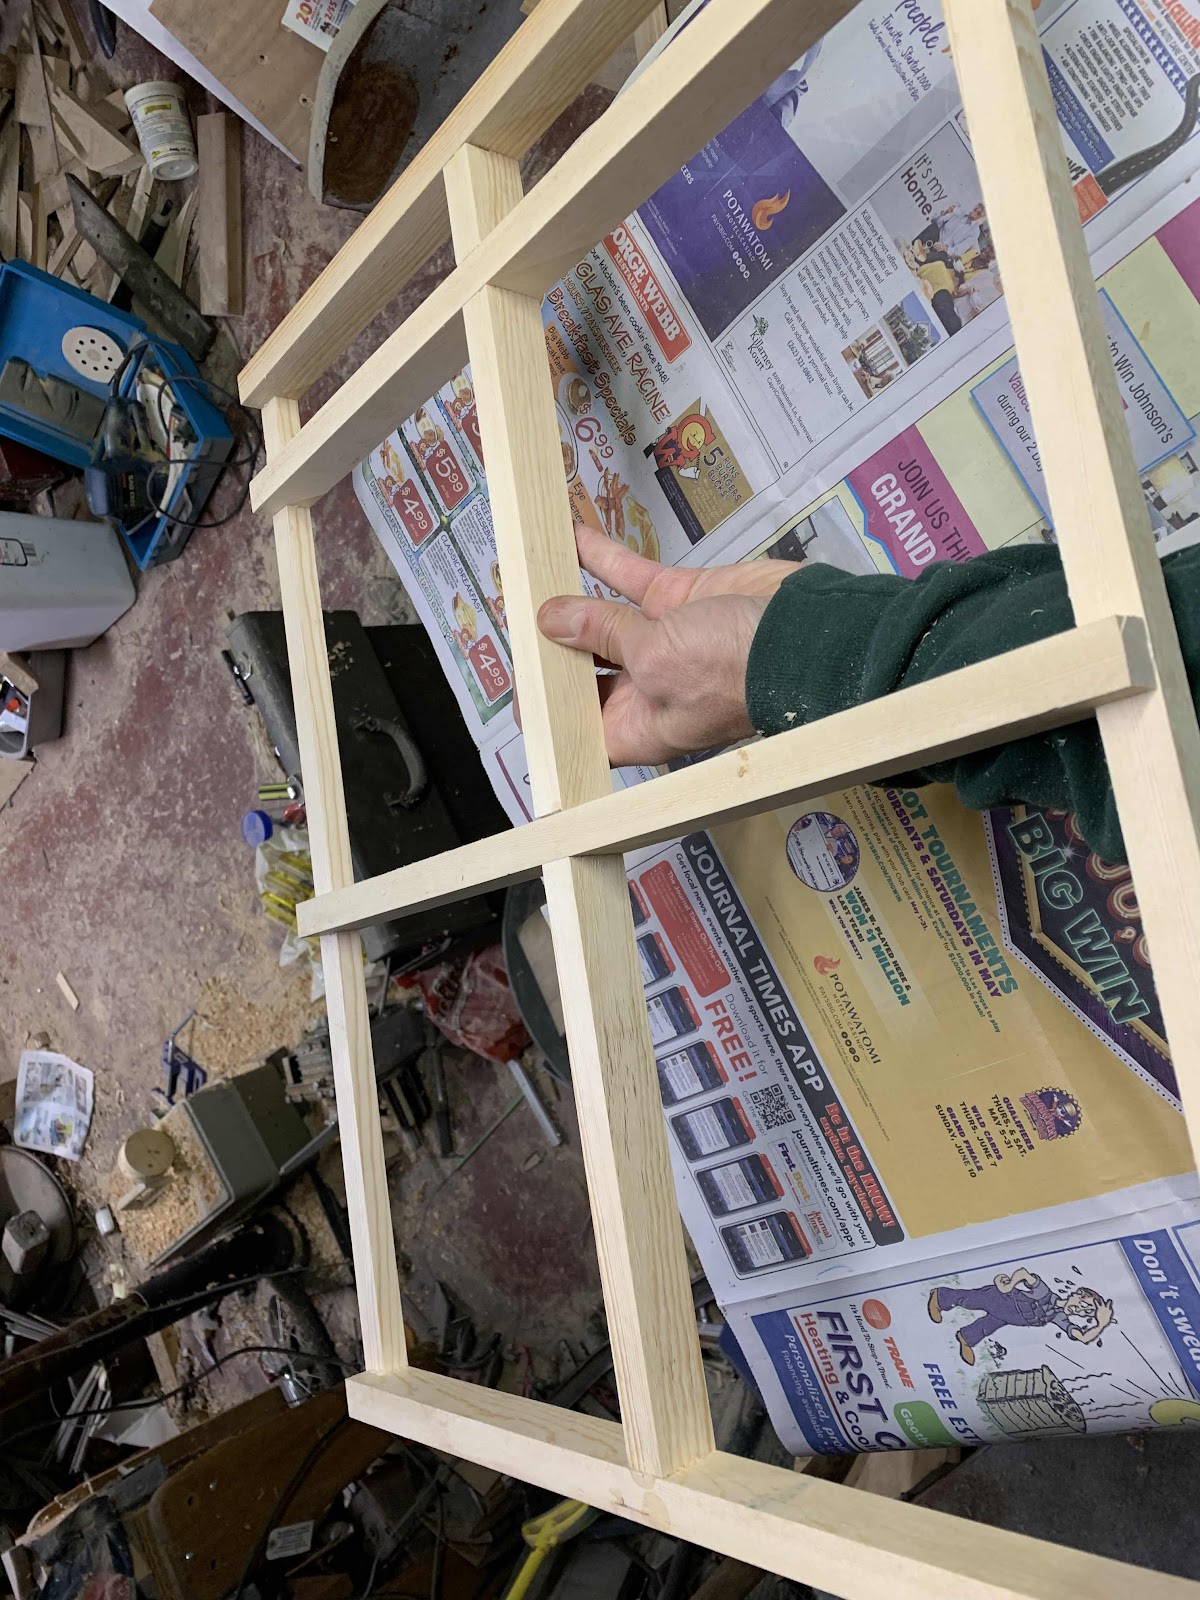
First frame going together.  The side pieces have some space underneath to allow the flour to fall through.  I used a dado head on a radial arm saw to make the corner joints.  After gluing the frame up, I nailed a piece of 3/16" plywood to the bottom.

Saturday, December 21, 2019

Compost Spreading

After getting soil tests done on the Newman Rd field in July it became clear that the nutrients were deficient.  Both potassium and phosphorous were seriously deficient, so I looked around for some manure.

Starting in August I went looking for a supply, and ended up getting some pretty nice composted manure.  The first three loads were from a cow farmer and fairly fresh.  Most of the loads came from a friend's horse farm and had been turned.

Working with a couple different spreaders until I purchased an IH 550 spreader (about 185 bushels I think), I managed to spread a couple hundred tons onto the field.  I have high hopes this will help the yield in 2020.

The IH 550 spreader.

The IH 550 spreader in action.

This John Deere spreader was borrowed for a portion of the spreading.  It could not hold very much and I returned it without doing too much work with it.


My neighbor Jim loaned me his dump trailer to move some of the compost.  What a great rig!

This is an old International spreader that I rented from the cow farmer.

Saturday, December 7, 2019

December Checkup

I did not keep track, but there was plenty of rain in the Fall of 2019.  Fortunately, it was more spread out than last year.  Even more importantly, the wheat was more established.  Here is what the Wisconsin No 2 looked like on December 7.  No problems it looks fine.


Friday, September 6, 2019

Winter Wheat Planting

I spent 2019 thinking that the fall planting would go in the north end of the field.  This part of the field had nothing since the 2018 spring crop of Marquis, only successive plantings of oats and peas.  I figured the south end would have to wait for dryer conditions.

However, I was able to get into the south end by early July and worked it up several times.  Each time I killed more weeds and I felt the soil looked pretty good.  I also put about ten loads of compost down, and it looked pretty clean after the rain came.  So I decided to put the fall planting in the south end.

I did considerable research and hemming and hawing over the planting date.  Conventional wisdom said I should wait until after September 20.  I posted the question online and all the academics were against planting earlier than the 20th, due to the risk of hessian fly and aphids.

I could not get a good answer to the simple question, "what am I risking by planting earlier?"  I know that last year the stand was not well established, and I suffered a lot of winter kill.  Old publications say wheat should be planted in late August or early September.  The amish I met out in western WI planted in late August, and a couple people online said the same thing. 

I decided to plant on Sept 9.  I know from watching previous years that if it started raining in the second half of month, all options would start to look pretty bad.  In practice, this is what happened.  Rain started around Sep 15, and I don't know of a single local farmer who planted winter wheat in 2019.  The rains just caused the planting window to close in.

It ended up that I planted 1.7 acres of Wisconsin No 2, at a rate of 130 lbs/acre.  I was using notch 20 on the drill.  I suspect that plumper wheat would have ended up lower than 130.  At any rate, I would have preferred around 110.

Although at this point I'm getting sick of all the small plots of seed that I'm growing out, I still continued with the Krymka, Goldcoin, Red May, and Early Noe.  They are tucked in to the Northeast corner.

The test plot/grow out area in the NE corner.

Tire placement, for reference.

The IH 330 really ran well this season.

Krymka is the largest planting, the most northerly of the plots.

Goldcoin is all the way east, and between the WN2 and Krymka.

Red May is just west of the Goldcoin.

I don't know what I will do with the Early Noe, but I want to maintain the seed stock.

Notch 20

Monday, July 29, 2019

2019 Wheat Harvest

The 2019 harvest on the Newman field was an overall bust.  The excessive rain combined with the poor soil nutrition meant that I basically maintained seed stock, and not much more.

Wisconsin No 2 came off on July 29.  It was around 14.8% moisture, excellent considering all the weeds I had to run through the combine.  By the time it was cleaned I had exactly 250 lbs of trustworthy seed.  There were a couple odd bags of "not quite pure" seed for flour, but otherwise it was just those five bags from a planting of 0.7 acre!  Aaargh...

I took the Vavilov off on the 30th.  It was much weedier and did not have any beautiful clear stretches like the WN2 had.  Although it was very wet, I put it out on a tarp in the sun and it came down beautifully.  After a few hours it was down to 12.1% mc.

Straw was baled on August 1, 42 bales worth.

The Marquis took forever to dry down enough for harvesting.  I probably tested with the combine at least three times.  It finally came off on August 5th or so, yielding about eight bags.

On August 3, I cleaned out the home test plot, including wheats Progress, Champlaign, Purplestraw, and Early Red Fife.  I also harvested the Wisconsin No 5 oats (Swedish Select), which looked amazing.

All the java wheat was harvested by sickle.  Although this was just a grow-out year for seed, I'm actually quite excited about it.  The java grew better than anything else this year.  The projected yield was something like twenty bushels per acre, which for this field and in comparison to other 2019 crops was incredible.

Drying out some seed stock in the sun.  Although this is a pain, if the weather is good it will do a great job of drying out wheat.
Swedish Select, AKA Wisconsin No 5 oats.  Big, beautiful stalks!

The New Holland baler was a real joy to work on.  It did not do a perfect job, but I found good information online and made decent progress on it.  I am hopeful it will run very well next year.  I baled both straw and hay from the Newman Rd field.

Wednesday, May 15, 2019

Potatoes

It's mid-May and still no sign of good soil conditions.  I did some hand-working of a small section and put a few potatoes in.  These are some purple spuds I traded for through the Kenosha Potato Project.  Supposedly the colored-flesh potatoes are healthier.  Can't wait to see how they taste!


It's about a 15-foot row to the East of the wheat testing area.


Wednesday, May 8, 2019

May Survey

Here is what the Newman Rd field looked like this week.  The UW-Extension wheat report said that wheat in Southern Wisconsin is two weeks behind where it was last year.  Last year was also a late year, so I guess that's where climate conditions may be headed in my part of the world.  Cold, late, wet springs.  I feel bad that these conditions coincided with the first major planting of Wisconsin No 2 wheat in 80 years.  All that precious seed killed by these awful growing conditions!  But enough survived for the project to continue.

The latest climate summary from NOAA just announced that the last 12 months were the wettest on record in the US.

This is the Haynes Bluestem planting.  There is a slight washout from spring rains but otherwise it looks good.

Here is the Marquis planting.  Coming up on schedule.

The Vavilov (left) and Wisconsin No. 2.  There is no longer any denying it--the winter wheat planting was heavily damaged.  Based on the patterns and extensive washout, I believe that 90% of the damage was caused by the severe heavy rains in September, October, and November of last year.  It could be that some of it was winter-kill, but I really think most of it was rain-kill.  A combination of the saturated conditions, and the attendant cloudy cold conditions (which severely limited growth before winter set it), really doomed this planting.  I will at least be able to get back the precious seed that I planted, and I expect at least a few bushels to sell.  But not nearly what I was hoping for!

A healthy section of the Wisconsin No. 2.

Here is what April looked like in my back yard.  Rain, wet, and cold.  It's now the second week of May and we're still dealing with highs in the low 40's with rain and overcast conditions.

Sunday, April 28, 2019

Java Plot

The Java has outgrown the home test plot so I put it in the Newmand Rd field.  I could have planted it when I did the the main planting on April 9, but I was kind of curious what a later planting would look like.  This meant I had to work up a section by hand, since the moisture from a big snowstorm compacted the soil.  With the wheel hoe I worked up a section 27' x 12' on the North end of the WN2 planting, and drilled in with the earthway as usual.  465 grams, good conditions for planting (at least up in this high and mostly dry spot).


Here is the Wisconsin No 2 up close and personal.

The Vavilov and Wisconsin No 2 were both significantly damaged in the rain last September and October.  It feels good to see some green, but probably half of the crop was lost.  More annoying is that I will probably have to do some hand weeding in the field to keep things under control now.  A spotty stand will have trouble keeping weeds at bay.

Here is what the Marquis looks like, up close and personal.  It's coming up very slowly, which is to be expected.  Weather has been cold and damp.


Sunday, April 21, 2019

Pizza Plot

2019, just like 2018, is not offering any simple solutions in the garden.  Relatively little soil was worked up last fall, due to the extraordinary wet conditions.  Really, the soil was continuously saturated from late September through right now.  I am planting only on the highest spots, and unable to do much good tillage.  About a week ago the donkeys plowed a 5' wide strip (we quit since it was hard to find ground dry enough to plow).  It was really just a test but now I'm using it for planting!  I drilled in 185 grams of extra Haynes Bluestem wheat in a 4' x 25' plot.  This will be enough to make a couple loaves of bread for the fall pizza party--the first loaf of Haynes Bluestem that anyone has eaten in 100 years!  I'm very curious to see how this wheat bakes.  It's really the most distinct wheat I've worked with to date.


Tuesday, April 9, 2019

Newman Rd Spring Wheat planting

April 9 turned out to be planting day for spring wheat on the Newman Rd field.  I only planted Marquis as market wheat.  The other plantings were test plots for growing out seed.  As I've come to expect, waiting for good planting conditions is sketchy.  We had a reasonable drying trend, but then it rained more on Saturday than I had hoped.  Sunday was not very sunny, but then Monday the sun came out.  By Wednesday there was snow and rain in the forecast.  More rain and cold after that, for at least ten days.  Ergo, plant on Tuesday, or wait another two weeks.

Here are the two test plots, at the South end of the winter wheat planting.  In the foreground is Wisconsin Wonder oats (Wisconsin Pedigree No 1), measuring 27.5' x 15'.  To the right and further back is the strip of Haynes Bluestem, now in it's fourth year of growing out.  That plot is 102' x 15', and it has 2013 grams of seed in it (126 lbs/acre).  This was all done with the Earthway.  I could have used the big drill on the 330 to plant the bluestem, but it would require a lot of messing around with the vacuum cleaner and still using the Earthway to fill in at the ends.  I have found that the van brunt drill is not that great when it gets down to the last few seeds--the seeding rate plummets.  So just running the earthway back and forth for 25 minutes is really the best option.

Last year I planted 115 grams of Haynes Bluestem and harvested 2368 grams, almost exactly 20:1.  I hope we can do as well out here--the soil is not quite so good as in my garden.  But 20:1 would yield 80 lbs, which would be pretty nice!  Enough to plant 1/2 acre in 2020.

After planting the Marquis and the small plots for growing out seed, I vacuumed out the wheat seed and filled up the hopper with oats and peas.  I also added some split peas that a supplier was throwing out (all organic btw).  Set the rate to notch 29 and made a few passes on the perimeter of the wheat planting.  I hope to get a summer cover crop in the entire field soon.  But I will have to wait for the wet areas to dry up first.

So the Marquis just went parallel to the winter planting, towards the East.  I basically planted until the slope of the hill got into wetter ground.  This ground was also weedier, because I could not work it well last year.  I stopped at around 95 lbs of seed, which turned out to be 86' of width.  86' x 354.5' = .7 acre.  I was using notch 27, and the planting rate calculates out to 135 lbs/acre.  I would have preferred a little more, around 150/acre.

The Haynes Bluestem, looking west.  The winter wheat is off to the right.

Notch 27 for the Marquis resulted in 135 lbs/acre.


It was 2017 Marquis seed.  I sold every bushed from the 2018 harvest!

I got the tractor stuck after working up the seed bed.  I messed around with some stones and boards, but could not get it to budge.  So I left it for a few hours while I went to plant with the 330.  Later in the day I went back and got it out with the help of a neighbor.  He pulled the drag out of the way with his small utility tractor.  Ultimately, we wrapped a chain around the left tire, attached the chain to a tree, and backed it up until we found solid ground.  What a mess--this is the third time in a year that I've gotten the tractor seriously stuck in this field!