Tuesday, October 27, 2015

Eco j oven project

Build sequence of the oven I built with Christin at the Eco-Justice Center.  We did most of our sessions together, and we each have at least 40 hours in this project.  It's a substantial undertaking, and we worked very fast and hard.  A more leisurely pace, or working without experience (this was my 5th oven) would make this project go significantly slower.  Material expenses came in around $1200, but I don't think this included the concrete slab that the concrete blocks are sitting on.

November 3.  Our last big session of work together, spent applying stucco to the cladding.  We used the cement mixer and used up 1 80 lb bag of stucco, using a mortar color to get the nice tan color.  The stucco took a lot of pressure to stick, but overall it went on nicely and the color is actually quite stunning to see in person.  The chimney height is a wild guess but it looks about right.


October 29.  Christin did some chimney work the day before and we did a small amount of planning on this day.  Too cold so we quit early.


Concrete cladding going on October 27.  We used a total of 14 60 lb bags of premix.  I used an air-entraining admixture to improve the workability of the concrete.


We used our hands, trowels, wood blocks, and a large random orbital sander to get the concrete to settle.


Cladding took around three hours, all hard work.  We pulled the forms off about 5 hours later and worked the concrete around the lip where the wall met the dome.  There was a little damage to the cladding when the form pulled away some small chunks down low on the sides.  We plan to fill this in with some stucco/mortar.


The dome covered with 3-5 layers of heavy duty aluminum foil, which reflects heat and helps to decouple the cladding from the brickwork.  Reinforcing wire is some ordinary fencing material.


The arched oven opening came out nice.


Christin jumped inside to tuckpoint some gaps in the brickwork.


Back corners were formed with just 4 bricks.  Cutting these bricks takes a long time on the 10" wet saw, which cannot cut all the way through a brick laid on edge.  So a double taper cut takes 4 passes of the saw.


By keeping the corners at the front and the back tight, the closing in process is greatly simplified.  In the back we just laid two courses in a staircase, then closed things up with bricks and 45 degree cuts.  This kind of cut is easy on the wet saw.


October 16--all three arches are up, and most of the outline is in place.  We did arches 2 & 3 in the same session, and I pulled the form out just a little too soon. The #2 arch slumped ever so slightly at the peak.


Arch work pics that Kate took, probably October 16 or so.


Closing up the front.  You need to set the front opening first, and then fit the sides of the oven to that opening.  This oven has 3 brick arches, which I think is probably a very good depth for most applications.  We would have liked to make this oven wider but this was the widest we could go on the slab that was provided.


October 14.  I put up the first arch.  After this point Christin laid most of the bricks while I spent most of my time cutting bricks and planning the next move.


October 12. Pouring the floating slab. This is the critical innovation in an Alan Scott oven.  The oven slab is suspended and decoupled from any mass that could draw heat out of the oven's mass, just being suspended on 5/8" re-bar.  The bottom of the slab is a vermiculite/cement mixture to add even more insulation.  Above the re-bar it is ordinary bagged concrete.  The slab came out good and flat, and pretty well tamped.


The front (over to the right) is open and 2 pieces of angle iron hold up the blocks.


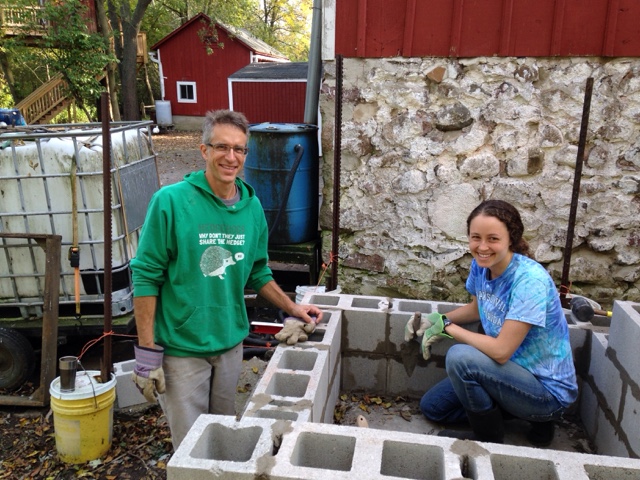
First day of work was October 5.  The concrete slab we started with was uneven and we did some correcting with the mortar joints to try and get things leveled up.


Bagging Scale

I put a homemade bagging scale onto my clean seed hopper to measure out 50 lb bags of seed.  I did not spend nearly as much time on this as I would have liked to, but so far it has bagged about 50 bags for me and it's working great. Here is a video I shot the first time I tried it:


The video depicts a spring-loaded bagg hanger which did not have enough strength to hold a 50 lb bag very well.  The next day I added a cam lock for the bag hanger, which is shown in the following pictures.  I glued some neoprene rubber onto the fingers to help grip the bags better.  I think inner tube rubber would also work.  It holds up those plastic burlap bags just fine, also. 100 lb bags would be fine as long as the balance beam was strong enough.  When I get a chance I need to work on the spring opening to make it easier to load a new bag.

Note the bag clamp  hangs from a single point.  I considered making the bag clamp integral to the balance beam but feel that hanging from a single point gives it a more accurate weigh.  Otherwise a swinging bag will throw off the weight setting.


The grain flows when the gate is pulled open.  A small rubber band pulls the gate shut.  The gate and guides are all sanded smooth and waxed.

I did not pay attention when drilling holes on the balance beam.  I would suggest measuring carefully from the fulcrum to the bag clamp hanging point, and then hanging the weights on the balance beam at obvious multiples, eg. 2 x or 4 x. Then adding or removing weights on the balance beam to change from, say, 25 lb to 50 lb bags will be easy.

NB: The fulcrum point is about 1/2" below a line drawn from where the weights are hung to where the bag clamp is hung.  This makes the beam "teeter totter" with authority when the bag is full.  A higher fulcrum point (I think) will make the beam tilt in gradual increments and (I think) make the bag weights less uniform.  You want the tipping point to have a waterfall effect, so that the trigger is pulled right when that last piece of grain goes into the bag.  This unit is filling up 50 lb bags with variance of about += 1 ounce.  I'm pretty happy with that!


Anyhow, the spring-loaded grain gate is held open by the bag-clamp apparatus (removed in the below picture for clarity), blocking this ramp-shaped piece of wood glued onto the grain gate.  When the bag fills up, the bag clamp drops down and no longer blocks this piece of wood, and the rubber bad pulls the gate shut.  In the below picture, part of the balance beam is doing essentially the same thing, holding the grain gate open.  In the upper right hand corner you can see a blue rubber band ready to pull the grain gate shut.


A view of the bag clamp on the bench.


To calibrate the scale, I just started hanging metal onto the long end of the balance beam until I got 50 lb bags.  Next time I will measure out and calculate, and maybe make a slick weight hanging system.  A farm scale might be useful as a starting point, but note that a farm scale does not have the crisp "waterfall" effect that we want to trip the grain gate.  The fulcrum point might need to be changed.

To do:  getting a 50 lb bag out of the clamp is a little awkward, and sometimes I get a small tear in the bag from the bag dropping to the floor when the clamp is opened up.  It might be possible to have the balance beam set the bag on the ground gently, somehow.


Sunday, October 18, 2015

First frost

Frost was forecast for October 16 & 17 and it did not disappoint.  I wish I had saved more of the peppers--for some reason I was convinced it would be so light that they would be spared.  But I think it was solidly in the 20's and the peppers are all done for.  Oh, well.


The swiss chard survived but I know it will die when it gets into the low 20's so I have started cutting it and feeding to the herd.  The tillage radishes that I drilled in next to the wheat testing plot was mostly killed, meaning that it was pretty much a waste to plant it.  It should have been planted earlier, or not at all.


The wheat test plot is growing well.


Of the tiny USDA wheat samples, the Bacska had the lowest germination rate.  The Turkey and Wisconsin No. 2 were both fine, but the Bacska was marginal.


I started the garlic on Saturday, October 17 and planted three rows 12" apart.  This is closer than I did last year, but "The Market Gardener" recommends just 10" so it should be OK.  I also planted some tiny onion plants and some onion sets as an experiment, in the high ground where the soil is the best.  The one row that did not have any onions used up 20 bulbs to fill up the 120' length.


Saturday, October 10, 2015

Aussie Bacska

6.5 grams of Bacska wheat finally arrived from the Australian Cereal Grains genebank yeaterday.  The USDA requires that these seeds be propagated in a greenhouse so I potted up some compost and put about 20 seeds in each pot.  I kept a few seeds back in case they need to be inspected.  I am interested in the Aussie Bacska since the USDA has propagated it's Bacska as a Spring wheat, even though it's supposed to be a Winter wheat. 

Monday, September 28, 2015

Winter cover crops in place

The West strip was plowed and then disced by the full team.  Plowing was pretty good and it was satisfying to pull out some old rotting tree roots.  However, as usual there are always a few skipped spots.  At this point I don't know if that little plow does as much good as a thorough digging with the 9" sweeps and judicious use of deep cover crops.  It will be interesting to see if this ground can be brought up to the standard of the higher and drier areas of the garden.

Here is how it looked after discing.


I broadcast Turkey Red winter wheat and a small amount of hairy vetch on 9/27.  Unfortunately I could not source enough vetch in time for a full planting.  I am going to broadcast all winter hardy cover crops this season, in lieu of drilling them in.  The drilled in rows were difficult for me to terminate this year.  I hope that the sod will be more dispersed in a broadcasted crop.  Also, I'm planting wheat in lieu of rye in the hopes that it will be easier to terminate.  After broadcasting I grabbed Sebastian and pulled the drag over once.  There is some rain in the forecast but not as much as I had hoped.


Friday, September 25, 2015

Historical Grain Research Plot

I am doing some very exciting winter wheat comparisons on the cucurbit ground.  On the absolute best patch of ground in this strip, I put in the 3 winter varieties from the USDA small grains collection.  Bacska ( developed by the University of Wisconsin from seed collected in Hungary in 1900, released in 1918), Turkey Red (donated in 1991 by the N.I. Vavilov Research Institute of Plant Industry ), and Wisconsin Pedigree No. 2 (developed in 1918 at the University of Wisconsin from a selection of Turkey Red)  The USDA will only release 5 gm of seed for testing purposes, which is about 137 wheat seeds.  So I took very good care of them!  They were hand planted and spaced about 1" apart.

There is more information about Bacska and Wisconsin Pedigree No. 2 in the 1919 UW publication Wheat Growing in Wisconsin.  On page 16 the author writes, "Of the winter wheat varieties those of outstanding importance are the Ped. No. 2--Turkey Red and Ped. No. 408 Bacska.  Other varieties have shown very good promise so far as yield is concerned, but these two are not only high yielders but are also the two best wheats from the milling and baking standpoint."


Both of these shots are facing South and a little East.  From East to West, the planting is Turkey Red, Wisconsin Pedigree No. 2, and Bacska.


To protect these small, vulnerable rows, and to do further testing, I surrounded the tiny USDA planting with mulitple, 100' rows of three strains of Turkey Red.  From left to right in the picture, I planted rows of Turkey Red from the Ehmke Seed Company, from Heartland Mill, and from my own 2015 harvest.  The Heartland and Anarchy Acres plantings each comprise exactly three rows drilled in with the Earthway seeder.  The Ehmke has extra rows since it surrounds the USDA planting to the North and South, as well as to the East.

The Ehmke seed is certified from a 2015 crop and was grown out from stock that the Kansas State University research farm has maintained.  K-State has worked with their Turkey and rogued out elements that don't match Turkey.  According to Vernon Shaffer at the University, Turkey is known for being "tall, late, and small heads."  He also emphasized that Turkey is not a precise variety of wheat but more like a class of wheat, and that historically Turkey wheat had a range of variability within it.  Specifically Vernon said that the height of Turkey is supposed to include tall and some shorter stalks, but not as short as modern dwarf wheat.

The Heartland Turkey is milling wheat I purchased last year.  It is 2014 crop.

The Stephens Turkey is from wheat I grew on Spring Street and is 2015 crop.  It was brought to Wisconsin about 3 years ago and my seed was purchased from Lonesome Stone Milling.


5:45 pm on Tuesday, September 29th.  96 hours in the ground--wow!  Hard to capture in a picture, but the early signs are that the Heartland Turkey is coming up the fastest.  The Ehmke is harder to spot, and I can't find any Stephens Turkey up at all.  I wonder if the differences will maintain or fade away.


Here is the view on October 1.  Now you can see the Stephens Turkey (right three rows) coming up.  All the wheat looks healthy.


You have to squint to see the USDA samples.  These were hand planted and may have ended up deeper than the other stuff, which was seeded with an Earthway push seeder.  I actually didn't think it was that deep at all when I was trying to open up a trench with a hoe, but I did tamp it down well by walking on it and that may be the difference.  I don't anticipate any problem with the USDA stuff but I will be relieved when it is all up.  There is no rain in the forecast and we only received about 3/8" since planting.  I may water the USDA samples if it looks real dry out there.


More ground prep

I am working to try to reduce clogging and do a better job of terminating cover crops.  To reduce clogging I think that fewer tines will pick up less stuff.  I'd also like to move the tool bars further apart and move or eliminate the rear cross member.  The last two items will take work, time, and re-design, but buying 9" sweeps was pretty easy.  The unit is covering substantially the same width with two fewer tines now, so two less opportunities to drag trash around.  It seems to be working.  I think I will grind the sweeps sharp so they cut better.  Right now they can sometimes bounce off of tough roots without slicing through.


Here is how the cucurbit strip looked after a few times through with 9" sweeps.  This is the best seed bed yet.  This strip was new ground in the Summer of 2014, over wintered rye, winter manure added.  It is just mellow wonderful soil now.


The corn field after a few drags.


Final pass through the cucurbits before planting.  This picture was taken the morning of Friday, September 25.


The same morning we plowed down the corn field.  It looks better in the picture than it does in person.  There are skips but I'd say 80% of the field is turned under.